Eclipse Notes, Java's Vector API, and JITWatch
November 15, 2021
This blog post is a collection of notes on how I like to setup the Eclipse IDE, and a starting point for how to use Java's new Vector API. I'll also show how to use JITWatch to see how Java source code transforms into Java bytecode and Intel assembly instructions. That tool is particularly helpful when trying to figure out performance issues with vectorized code.
Part 1: Installing the Eclipse IDE and a Couple Plug-Ins
- Download "Eclipse IDE for Java Developers" and extract the archive. You may also want to place a link to "eclipse.exe" on your desktop or taskbar.
- Open Eclipse. On the first run it will ask you where to create a workspace. The default location is fine. After the IDE appears you can check for updates and optionally install a couple plug-ins that I find very helpful: "Jeeeyul's Eclipse Themes" is a plug-in that improves the appearance of the GUI, and "Launch Configuration View" is a plug-in that makes it easier to manage projects with several run configuations (as we'll see later.)
https://www.eclipse.org/downloads/packages/
Open Eclipse
    Check "Use this as the default and do not ask again" > Launch
    Close the Welcome tab
    Close the Donate tab
    Help > Check for Updates
    Help > Eclipse Marketplace
        Search for "jeeeyul" > Jeeeyul's Eclipse Themes > Install > Confirm > Accept > Finish > Check the box > Trust Selected > Restart Now
    Help > Eclipse Marketplace
        Search for "launch" > Launch Configuration View Latest > Install > Finish > Install Anyway > Restart Now
Note: It looks like the upcoming 2021-12 release of Eclipse will come with Launch Configuration View already included.
Part 2: Eclipse GUI Tips
- Enable Jeeeyul's Theme and configure it as desired. You can adjust one of the included themes to your taste, or download my theme which is a slightly modified version of the default theme.
- Add the "Tasks" tab to your current perspective. It lists the TODO's/FIXME's in your code, which is particularly helpful when working on large projects or collaborating with other people.
- Add the "Breakpoints" and "Debug" tabs to your current perspective. This makes is easier to debug code without having to switch to the Debug Perspective.
- Add the "Launch Configurations" tab to your current perspective. It lists all of your Run Configurations and External Tool Configurations, which is a little more convenient than accessing them through menus.
- Add the "Terminal" tab to your current perspective. This is a quick way to get to the command line (cmd.exe) from within the IDE.
- Keep the Project Explorer in sync with the currently active file editor tab.
- Simplify the GUI by removing undesired toolbar buttons.
Window > Preferences > General > Appearance > Theme = Jeeeyul's themes - Custom Theme > Apply and Close > Restart
Window > Preferences > General > Appearance > Jeeeyul's Themes > Presets > Import > Select "Eclipse Theme" > Apply > Apply and Close
Window > Show View > Other > General > Tasks > Open
Window > Show View > Other > Debug > Breakpoints > Open
Window > Show View > Other > Debug > Debug > Open
Window > Show View > Other > Debug > Launch Configurations > Open
Window > Show View > Other > Terminal > Terminal > Open
Click the "Open a Terminal" toolbar icon inside that tab to obtain a terminal.
Project Explorer > Link with Editor (it's a toolbar button)
Window > Perspective > Customize Perspective > Toolbar Visibility
    uncheck "Terminal"
    uncheck "Jeeeyul's Eclipse Themes"
    Launch > uncheck "Coverage"
    uncheck "Java Element Creation"
    uncheck "Search"
    uncheck "Navigate"
    uncheck "Help"
Part 3: Eclipse Preferences Tips
- Often it will look like Eclipse has frozen but if you look in the lower-right corner you'll see a small progress bar. Instead of doing things "in the background" I prefer it to be more obvious:
- If you mouse over a JavaDoc pop-up, it will wait a few seconds before showing more details. I prefer not to wait:
- Several plug-ins load at startup but you can disable the ones you don't care about:
- The workspace name is shown in the title bar but if you only use one workspace you probably don't need to see that:
- Incubating features (like the Vector API) are located inside the jdk.* packages. Content-Assist will not recommend anything from those packages because they are not used by most developers. But we'll be trying out the Vector API so we actually want those recommendations:
- When debugging multithreaded code a breakpoint can be used to pause one thread or all threads. The default of pausing one thread is fine but you might want to pause all threads in some situations:
- Auto-completion can be used to replace existing code or simply insert the rest of a proposed identifier. The default of replacing code can be helpful, but I find it causes more problems than it solves. I also perfer auto-completion to only kick in when I press Enter, not when I press Space:
- Unlimited scroll back in the console is very helpful:
- If you use Eclipse's Git features then you probably want to specify your name and e-mail address:
Window > Preferences > General > uncheck "Always run in background"
Window > Preferences > General > Editors > Text Editors > "when mouse moved into hover = enrich immediately"
Window > Preferences > General > Startup and Shutdown > uncheck "buildship..." "equinox..." "language server..." and "oomph..."
Window > Preferences > General > Workspace > uncheck "show workspace name"
Window > Preferences > Java > Appearance > Type Filters > uncheck "jdk.*"
Window > Preferences > Java > Debug > "default suspend policy for new breakpoint"
Window > Preferences > Java > Editor > Content Assist > "completion inserts"
Window > Preferences > Java > Editor > Content Assist > check "disable insertion triggers except enter"
Window > Preferences > Run/Debug > Console > uncheck "limit console output"
Window > Preferences > Version Control > Git > Configuration > User Settings > Add Entry > "user.name = Your Name" and "user.email = youremail@example.com"
The above preferences affect all projects. Changes that only affect the current project can be made with:
Project > Properties
For more tips and tricks, check out Noopur Gupta's "Mastering Your Eclipse IDE" talk at Eclipsecon 2019:
Video: https://www.youtube.com/watch?v=8WcntACvfl4
Slides: https://www.eclipsecon.org/sites/default/files/slides/Mastering%20your%20Eclipse%20IDE%20-%20ECE%202019.pdf
Part 4: Installing Several JDKs
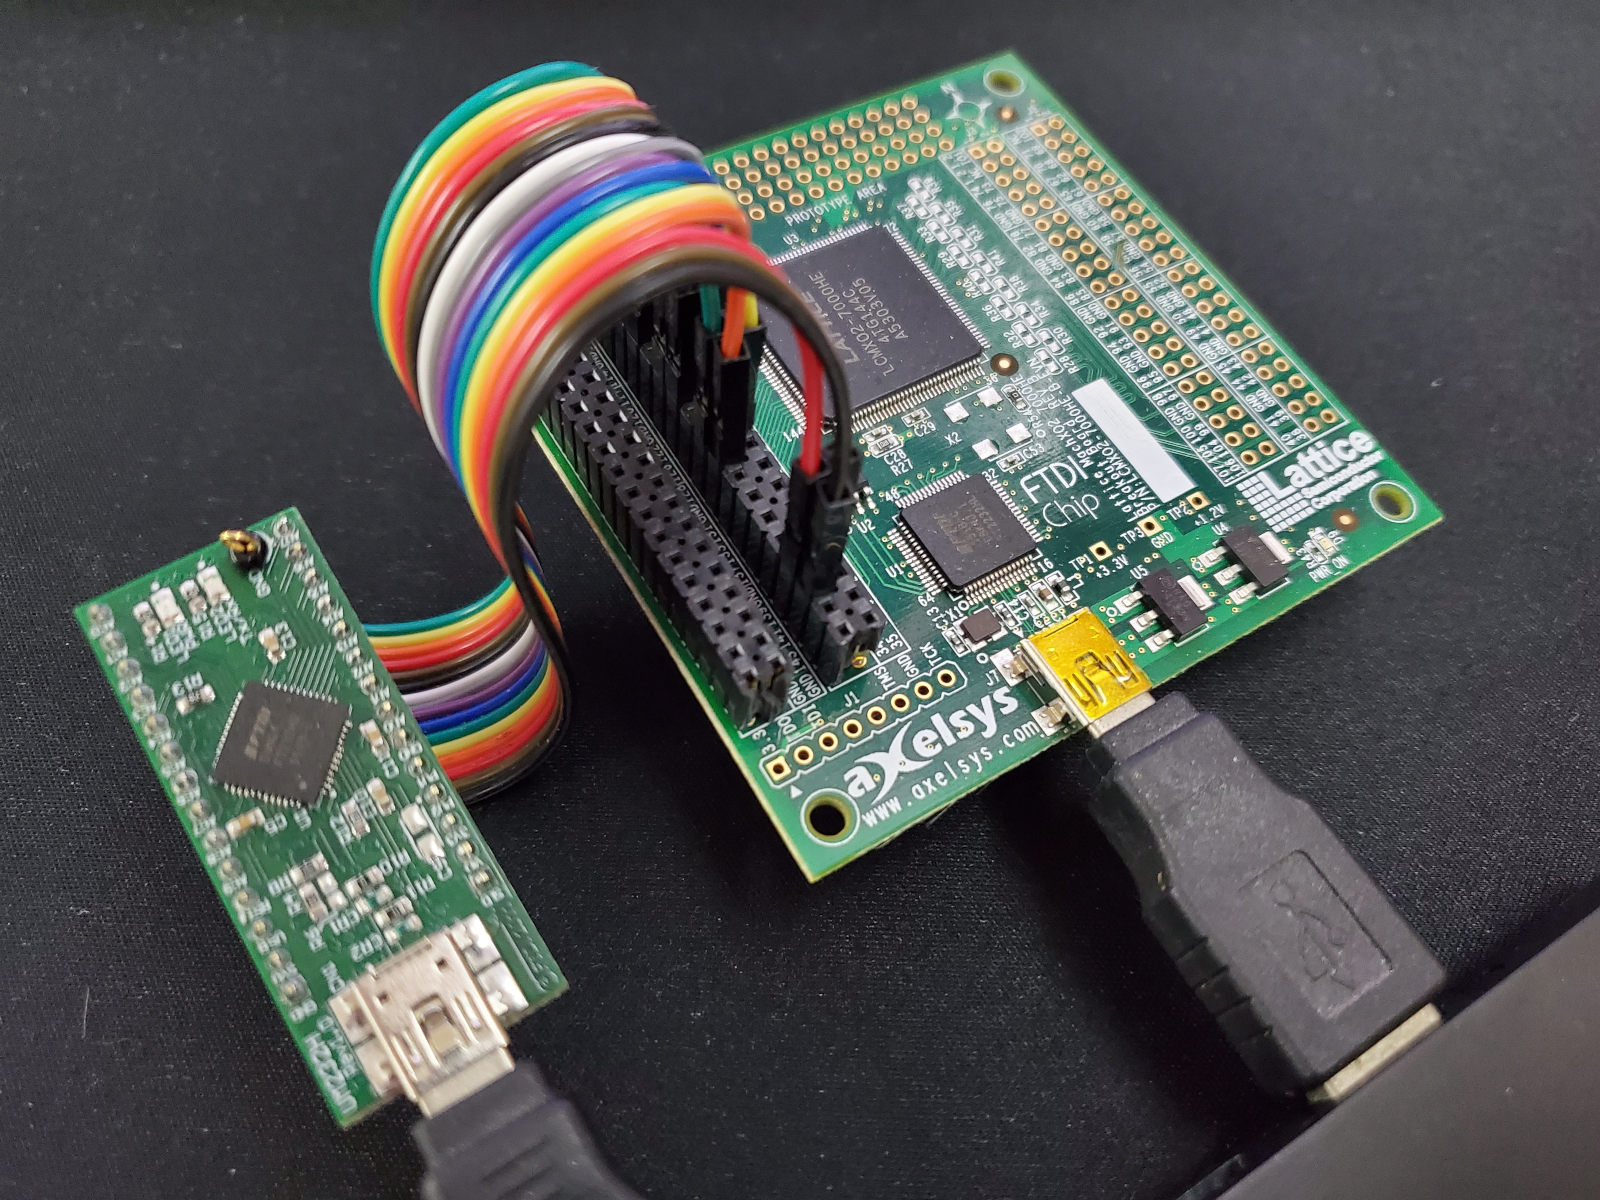
The Vector API is still "incubating" and undergoing lots of development. Performance differences between JDK versions can be drastic so I'll be testing my code with multiple JDKs on multiple OS's on multiple architectures. Development will be done with Windows, but I'll also test on a Linux VM, and on a Raspberry Pi 4 (using two versions of Raspberry Pi OS: the default Arm32 version and a beta AArch64 version.)
The OpenJDK project provides builds for a few operating systems and architectures:
https://jdk.java.net/archive/
An alternative source for builds is the Adoptium project. They support a wider variety of OS's and architectures. They also provide convenient installers for Windows but I'll be using their ZIP files because I want to have multiple JDKs available on the same machine.
https://adoptium.net/releases.html
Java 18 is still under development at the time of writing. There are Early Access builds on the OpenJDK website but I'll be trying some "nightly" builds from Shipilev's web site instead. The "server-release" archives provide what we need:
https://builds.shipilev.net/openjdk-jdk/
I downloaded Java 16, Java 17, and a Java 18 nightly build, then made a "java_projects" folder on my Desktop and extracted the JDKs there. The Eclipse IDE includes the JustJ distribution of Java 16, but it doesn't seem to include the incubating Vector API so we must switch to one of the downloaded JDKs. Let's tell the Eclipse IDE about the new JDKs and change the default one to Adoptium Java 16:
Windows > Preferences > Java > Installed JREs
    Add > Next > Directory > go to Desktop/java_projects/jdk-16.0.2+7 > Select Folder > set "JRE name" to "jdk-16" > Finish
    Add > Next > Directory > go to Desktop/java_projects/jdk-17.0.1+12 > Select Folder > set "JRE name" to "jdk-17" > Finish
    Add > Next > Directory > go to Desktop/java_projects/jdk > Select Folder > set "JRE name" to "jdk-18-nightly" > Finish
    Check the box next to "jdk-16" to make it the default.
    Apply and Close
Part 5: First Steps with Java's Vector API
If you're new the Java's Vector API, the following resources may be helpful:
- JEP 338 for Java 16: https://openjdk.java.net/jeps/338
- JEP 414 for Java 17: https://openjdk.java.net/jeps/414
- JEP 417 for Java 18: https://openjdk.java.net/jeps/417
- "Vector API: SIMD Programming in Java" talk by Paul Sandoz and Sandhya Viswanathan:
https://www.youtube.com/watch?v=VYo3p4R66N8 - "The Vector API in JDK 17" talk by Paul Dandoz:
https://www.youtube.com/watch?v=1JeoNr6-pZw - "Vector API" talk by Kishor Kharbas and Vladimir Ivanov:
https://www.youtube.com/watch?v=1JeoNr6-pZw - JavaDoc for the Vector package:
https://docs.oracle.com/en/java/javase/17/docs/api/jdk.incubator.vector/jdk/incubator/vector/package-summary.html - JavaDoc for one of the Vector classes, since that is where most of the methods exist. I work with a lot of shorts (int16's), so the ShortVector class is used several times in my example code:
https://docs.oracle.com/en/java/javase/17/docs/api/jdk.incubator.vector/jdk/incubator/vector/ShortVector.html
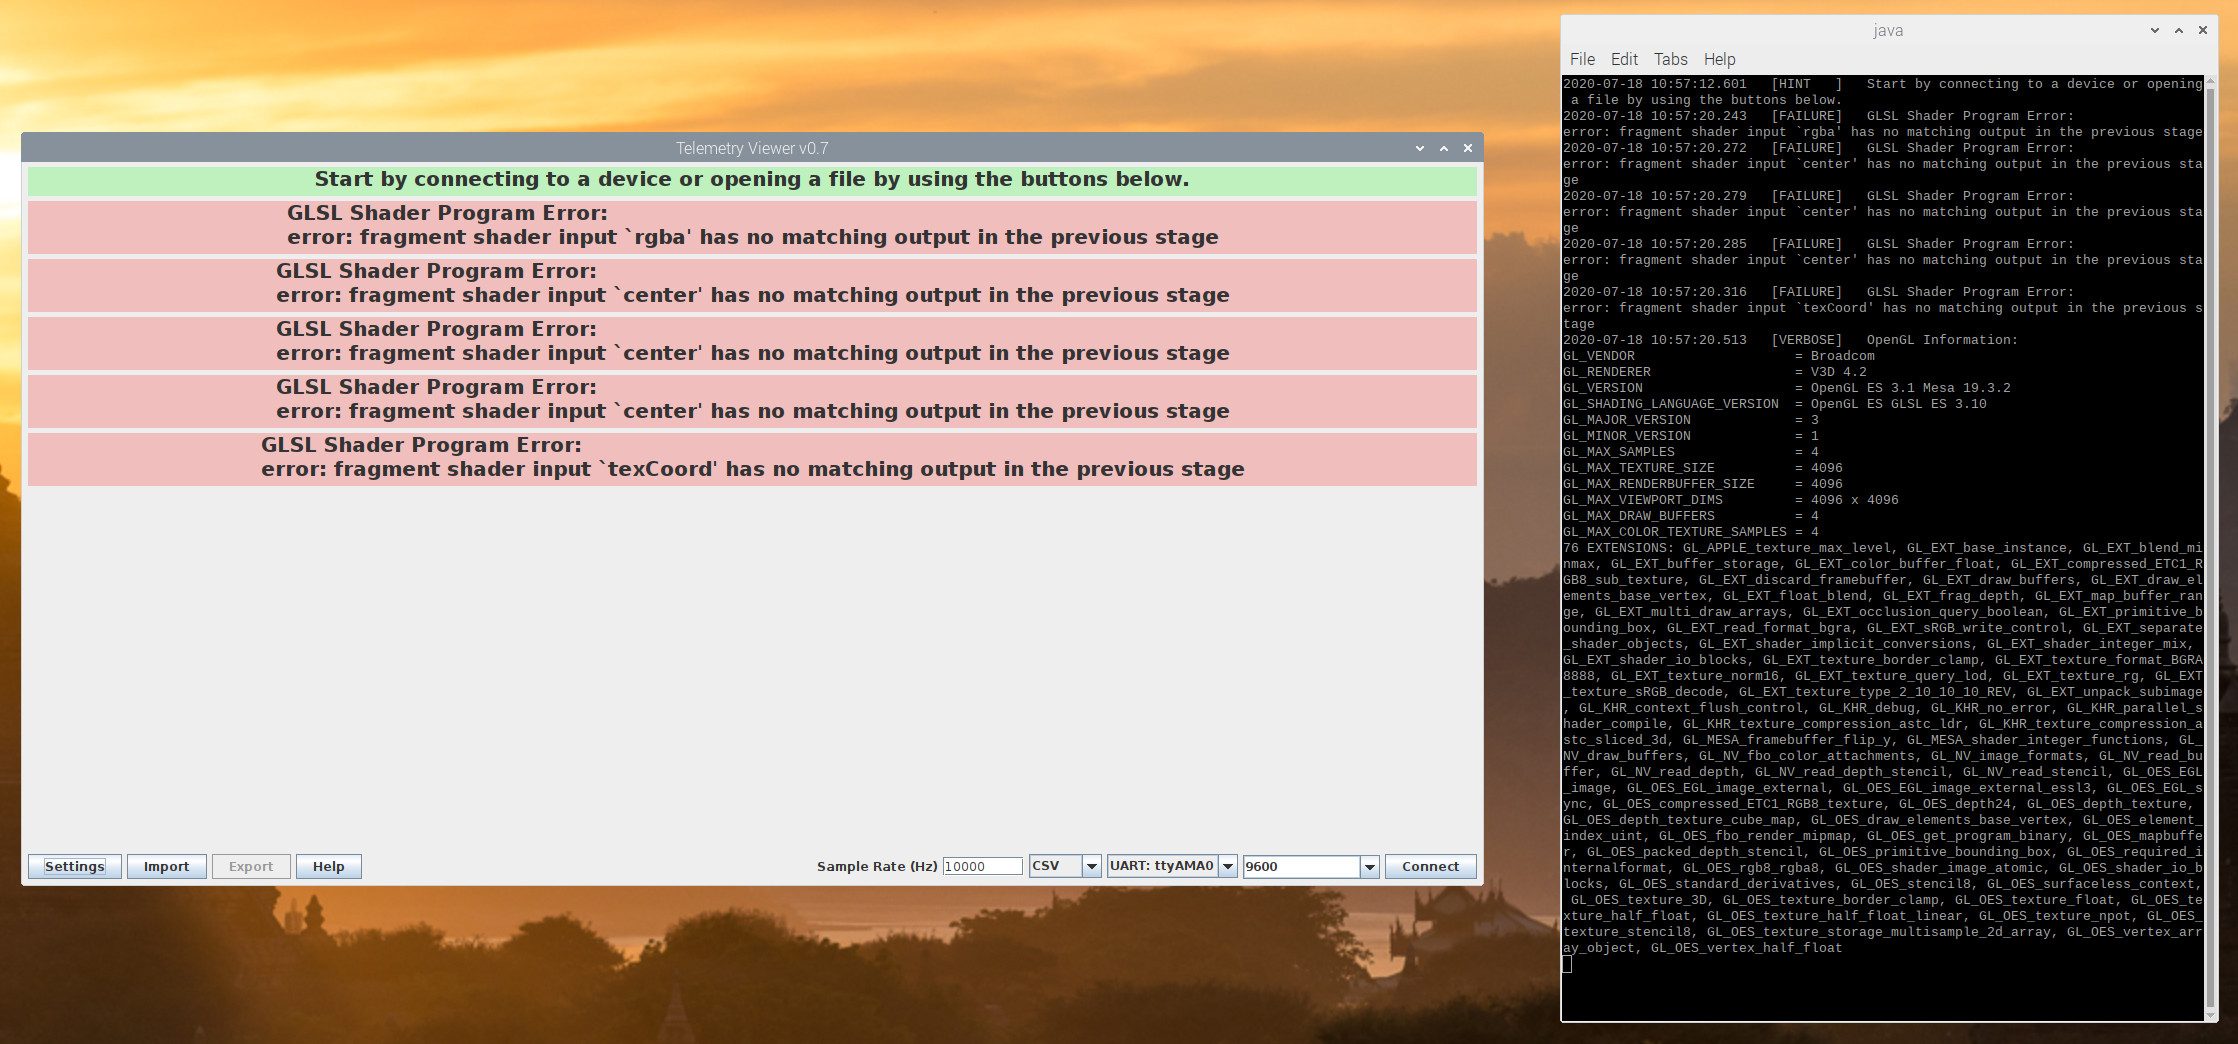
My curiosity in the Vector API comes from wanting to improve performance in Telemetry Viewer. One of my bottlenecks is in verifying the checksums of binary packets. My laptop can currently process approximately 20Gbps of telemetry. That's faster than I have a need for, but it would still be nice to improve things if that results in reduced power consumption.
Let's start by creating a new project and giving it a Main class:
File > New > Java Project > Project name = "Vector API Test" > Finish > Don't Create
File > New > Class > Name = "Main", and check "public static void main(String[] args)" > Finish
Here's some code I wrote that demonstrates a scalar way of testing checksums, and four attempts at vectorizing it:
import java.net.InetAddress;
import java.nio.ByteOrder;

import jdk.incubator.vector.ByteVector;
import jdk.incubator.vector.ShortVector;
import jdk.incubator.vector.VectorMask;
import jdk.incubator.vector.VectorOperators;
import jdk.incubator.vector.VectorShuffle;
import jdk.incubator.vector.VectorSpecies;

public class Main {

	// simulating checksum verification of binary packets
	// each packet contains 1 sync byte, then 8 payload bytes, then a 2 byte checksum:
	// AA 01 02 03 04 05 06 07 08 10 14
	// (0xAA is the sync word, then 4 little-endian int16's: 0x0201, 0x0403, 0x0605, 0x0807, then a little-endian int16 checksum: 0x1410)
	final static int packetByteCount = 11;
	final static byte[] buffer = new byte[3 * 1048576 * packetByteCount]; // 3M packets
	static {
		for(int i = 0; i < buffer.length; i += packetByteCount) {
			buffer[i   ] = (byte) 0xAA;
			buffer[i+ 1] = (byte) 0x01;
			buffer[i+ 2] = (byte) 0x02;
			buffer[i+ 3] = (byte) 0x03;
			buffer[i+ 4] = (byte) 0x04;
			buffer[i+ 5] = (byte) 0x05;
			buffer[i+ 6] = (byte) 0x06;
			buffer[i+ 7] = (byte) 0x07;
			buffer[i+ 8] = (byte) 0x08;
			buffer[i+ 9] = (byte) 0x10;
			buffer[i+10] = (byte) 0x14;
		}
	}

	/**
	 * Prints out some information about the computer and JRE, then benchmarks the code.
	 *
	 * @param args    Not used.
	 */
	public static void main(String[] args) {

		System.out.println("====================================================================================");
		try {
		System.out.println("hostname            = " + InetAddress.getLocalHost().getHostName());
		} catch(Exception e) {}
		System.out.println("java.vm.name        = " + System.getProperty("java.vm.name"));
		System.out.println("java.vm.version     = " + System.getProperty("java.vm.version"));
		System.out.println("java.vendor.version = " + System.getProperty("java.vendor.version"));
		System.out.println("os.name             = " + System.getProperty("os.name"));
		System.out.println("os.version          = " + System.getProperty("os.version"));
		System.out.println("os.arch             = " + System.getProperty("os.arch"));
		System.out.println("java.home           = " + System.getProperty("java.home"));
		System.out.println("user.dir            = " + System.getProperty("user.dir"));
		System.out.println("====================================================================================");
		System.out.println();

		System.out.print("Verifying checksums, scalar  code... ");
		long start = System.nanoTime();
		for(int repeat = 0; repeat < 500; repeat++)
			verifyChecksumsScalar();
		long end = System.nanoTime();
		double scalarMilliseconds = (end - start) / 1000000.0;
		System.out.println(String.format("took %9.3f ms", scalarMilliseconds));

		System.out.print("Verifying checksums, vectorA code... ");
		start = System.nanoTime();
		for(int repeat = 0; repeat < 500; repeat++)
			verifyChecksumsVectorA();
		end = System.nanoTime();
		double milliseconds = (end - start) / 1000000.0;
		System.out.println(String.format("took %9.3f ms      >>> %6.1f%% faster than scalar <<<", milliseconds, (1.0 - milliseconds / scalarMilliseconds) * 100));

		System.out.print("Verifying checksums, vectorB code... ");
		start = System.nanoTime();
		for(int repeat = 0; repeat < 500; repeat++)
			verifyChecksumsVectorB();
		end = System.nanoTime();
		milliseconds = (end - start) / 1000000.0;
		System.out.println(String.format("took %9.3f ms      >>> %6.1f%% faster than scalar <<<", milliseconds, (1.0 - milliseconds / scalarMilliseconds) * 100));

		System.out.print("Verifying checksums, vectorC code... ");
		start = System.nanoTime();
		for(int repeat = 0; repeat < 500; repeat++)
			verifyChecksumsVectorC();
		end = System.nanoTime();
		milliseconds = (end - start) / 1000000.0;
		System.out.println(String.format("took %9.3f ms      >>> %6.1f%% faster than scalar <<<", milliseconds, (1.0 - milliseconds / scalarMilliseconds) * 100));

		System.out.print("Verifying checksums, vectorD code... ");
		start = System.nanoTime();
		for(int repeat = 0; repeat < 500; repeat++)
			verifyChecksumsVectorD();
		end = System.nanoTime();
		milliseconds = (end - start) / 1000000.0;
		System.out.println(String.format("took %9.3f ms      >>> %6.1f%% faster than scalar <<<", milliseconds, (1.0 - milliseconds / scalarMilliseconds) * 100));

	}

	/**
	 * A scalar way of verifying the packet checksums:
	 *
	 * Interpret bytes 1 and 2 as a little-endian integer, then add it to an accumulator.
	 * Interpret bytes 3 and 4 as a little-endian integer, then add it to an accumulator.
	 * Interpret bytes 5 and 6 as a little-endian integer, then add it to an accumulator.
	 * Interpret bytes 7 and 8 as a little-endian integer, then add it to an accumulator.
	 * The lower 16 bits of the accumulator now contains the sum of the payload region.
	 * Interpret bytes 9 and 10 as a little-endian integer, then compare that to the accumulator. If they're not equal, the packet is corrupt.
	 */
	public static void verifyChecksumsScalar() {

		for(int offset = 0; offset < buffer.length; offset += packetByteCount) {

			int sum = 0;
			int lsb = 0;
			int msb = 0;

			lsb = 0xFF & buffer[offset+1];
			msb = 0xFF & buffer[offset+2];
			sum += (msb << 8 | lsb);

			lsb = 0xFF & buffer[offset+3];
			msb = 0xFF & buffer[offset+4];
			sum += (msb << 8 | lsb);

			lsb = 0xFF & buffer[offset+5];
			msb = 0xFF & buffer[offset+6];
			sum += (msb << 8 | lsb);

			lsb = 0xFF & buffer[offset+7];
			msb = 0xFF & buffer[offset+8];
			sum += (msb << 8 | lsb);

			sum %= 65536;

			lsb = 0xFF & buffer[offset+9];
			msb = 0xFF & buffer[offset+10];
			int reportedSum = (msb << 8 | lsb);

			if(reportedSum != sum)
				System.out.println("corrupt");
		}

	}

	/**
	 * Perhaps the most simple way to vectorize this algorithm:
	 *
	 * The payload region is 8 bytes, which is 64 bits, which is a commonly supported SIMD register size.
	 * Copy those 8 bytes into a SIMD register, treating the bytes as little-endian shorts.
	 * Calculate the sum of those little-endian shorts with a reduce operation.
	 * Finally, calculate the reported sum manually. If they do not match, the packet is corrupt.
	 */
	public static void verifyChecksumsVectorA() {

		VectorSpecies<Short> species = ShortVector.SPECIES_64;
		for(int i = 0; i < buffer.length; i += packetByteCount) {

			ShortVector vec = ShortVector.fromByteArray(species, buffer, i+1, ByteOrder.LITTLE_ENDIAN);
			short sum = vec.reduceLanes(VectorOperators.ADD);

			int lsb = 0xFF & buffer[i+9];
			int msb = 0xFF & buffer[i+10];
			int reportedSum = (msb << 8 | lsb);

			if(reportedSum != sum)
				System.out.println("corrupt");

		}

	}

	/**
	 * It might be more efficient to use a wider SIMD register, since modern processors support 256 bit (or bigger) registers.
	 * So let's try processing 3 packets inside one register:
	 *
	 * Copy 32 bytes into a 256 bit SIMD register, starting at the payload region of the first packet.
	 * Use 2 blend operations to remove the non-payload bytes (checksums and sync words) that exist between the payload regions of the three packets.
	 * Use 3 reduce operations (with masks) to individually calculate the sums of the 3 packets.
	 * Finally, calculate the 3 reported sums manually. If they do not match, the packet is corrupt.
	 */
	public static void verifyChecksumsVectorB() {

		VectorSpecies<Byte> byteSpecies = ByteVector.SPECIES_256;
		VectorMask<Byte> firstMask  = VectorMask.fromLong(byteSpecies, 0b11111111111111111111111100000000);
		VectorMask<Byte> secondMask = VectorMask.fromLong(byteSpecies, 0b00000000111111110000000000000000);

		VectorSpecies<Short> packetSpecies = ShortVector.SPECIES_256;
		VectorMask<Short> packet1Mask = VectorMask.fromLong(packetSpecies, 0b000000001111);
		VectorMask<Short> packet2Mask = VectorMask.fromLong(packetSpecies, 0b000011110000);
		VectorMask<Short> packet3Mask = VectorMask.fromLong(packetSpecies, 0b111100000000);

		for(int offset = 0; offset < buffer.length; offset += packetByteCount*3) {

			ByteVector bvec  = ByteVector.fromArray(byteSpecies, buffer, offset + 1);
			ByteVector bvec2 = bvec.blend(bvec.slice(3), firstMask);
			ByteVector bvec3 = bvec2.blend(bvec2.slice(3), secondMask);
			ShortVector svec = bvec3.reinterpretAsShorts();

			short sum1 = svec.reduceLanes(VectorOperators.ADD, packet1Mask);
			short sum2 = svec.reduceLanes(VectorOperators.ADD, packet2Mask);
			short sum3 = svec.reduceLanes(VectorOperators.ADD, packet3Mask);

			int lsb = 0xFF & buffer[offset+9];
			int msb = 0xFF & buffer[offset+10];
			int reportedSum = (msb << 8 | lsb);

			if(reportedSum != sum1)
				System.out.println("corrupt");

			lsb = 0xFF & buffer[offset+20];
			msb = 0xFF & buffer[offset+21];
			reportedSum = (msb << 8 | lsb);

			if(reportedSum != sum2)
				System.out.println("corrupt");

			lsb = 0xFF & buffer[offset+31];
			msb = 0xFF & buffer[offset+32];
			reportedSum = (msb << 8 | lsb);

			if(reportedSum != sum3)
				System.out.println("corrupt");

		}

	}

	/**
	 * The previous attempt was slow.
	 * Let's try 1 rearrange and 1 blend operation, instead of 2 blend operations.
	 * Let's also try 1 reduce operation, instead of 3. This will not catch all checksum failures, but this is just a test.
	 */
	public static void verifyChecksumsVectorC() {

		VectorSpecies<Byte> byteSpecies = ByteVector.SPECIES_256;
		VectorShuffle<Byte> byteShuffle = VectorShuffle.fromArray(byteSpecies, new int[] { 0, 1, 2, 3, 4, 5, 6, 7,
		                                                                                  11,12,13,14,15,16,17,18,
		                                                                                  22,23,24,25,26,27,28,29,
		                                                                                   0, 0, 0, 0, 0, 0, 0, 0}, 0);
		VectorMask<Byte> unusedBytesMask = VectorMask.fromLong(byteSpecies, 0b11111111_00000000_00000000_00000000);

		for(int offset = 0; offset < buffer.length; offset += packetByteCount*3) {

			ByteVector bvec = ByteVector.fromArray(byteSpecies, buffer, offset + 1);
			bvec = bvec.rearrange(byteShuffle);
			bvec = bvec.blend(0, unusedBytesMask);
			ShortVector svec = bvec.reinterpretAsShorts();

			short sum = svec.reduceLanes(VectorOperators.ADD);

			int lsb = 0xFF & buffer[offset+9];
			int msb = 0xFF & buffer[offset+10];
			int reportedSum = (msb << 8 | lsb);

			lsb = 0xFF & buffer[offset+20];
			msb = 0xFF & buffer[offset+21];
			reportedSum += (msb << 8 | lsb);

			lsb = 0xFF & buffer[offset+31];
			msb = 0xFF & buffer[offset+32];
			reportedSum += (msb << 8 | lsb);

			if(reportedSum != sum)
				System.out.println("corrupt");

		}

	}

	/**
	 * It looks like there may be a cleaner way to remove the non-payload bytes.
	 * One of the methods for filling a SIMD register accepts an array of indices.
	 * Like before, let's also try 1 reduce operation, instead of 3. This will not catch all checksum failures, but this is just a test.
	 */
	public static void verifyChecksumsVectorD() {

		VectorSpecies<Byte> byteSpecies = ByteVector.SPECIES_256;
		int[] indices = new int[] { 1, 2, 3, 4, 5, 6, 7, 8,
		                            12,13,14,15,16,17,18,19,
		                            23,24,25,26,27,28,29,30,
		                            34,35,36,37,38,39,40,41};

		for(int offset = 0; offset < buffer.length; offset += packetByteCount*4) {

			ByteVector bvec  = ByteVector.fromArray(byteSpecies, buffer, offset, indices, 0);
			ShortVector svec = bvec.reinterpretAsShorts();
			short sum = svec.reduceLanes(VectorOperators.ADD);

			int lsb = 0xFF & buffer[offset+9];
			int msb = 0xFF & buffer[offset+10];
			int reportedSum = (msb << 8 | lsb);

			lsb = 0xFF & buffer[offset+20];
			msb = 0xFF & buffer[offset+21];
			reportedSum += (msb << 8 | lsb);

			lsb = 0xFF & buffer[offset+31];
			msb = 0xFF & buffer[offset+32];
			reportedSum += (msb << 8 | lsb);

			lsb = 0xFF & buffer[offset+42];
			msb = 0xFF & buffer[offset+43];
			reportedSum += (msb << 8 | lsb);

			if(reportedSum != sum)
				System.out.println("corrupt");

		}

	}

}
Lots of errors will appear because Eclipse is still trying to use it's bundled JRE instead of Adoptium Java 16. This can be fixed by changing the project's JRE System Library:
Project > Properties > Java Build Path > Libraries > JRE System Library > Edit > "Alternate JRE = jdk-16" > Finish > Apply and Close
Some important notes:
- My use case of vectorizing checksums is not ideal. The data is not aligned on word or cache line boundaries, and there is little vectorized work to do. That means the cost of setting things up may eat away at most of the SIMD performance gains.
- This code is not an example of how to expertly vectorize your algorithms. I'm a beginner at it, and my troubles along the way inspired me to write this article.
- As we'll also see, some of the vectorizing attempts resulted in slower code -- sometimes massively slower! Part of this is due to the incomplete state of Java's Vector API, and part of it is due to my inexperience.
- Some of my vectorizing attempts are incomplete and won't catch all checksum failures. I stopped working on some attempts when it became obivous they were slow.
- A tool like JMH could be used to benchmark the code, but I decided to keep it simple and use timestamps instead. As we will see later on, I verified that the JIT was kicking in, and that it was not optimizing away my code, so I'm not worried about measurement inaccuracy. My measurements also correlate well with real-world observations while developing Telemetry Viewer.
Part 6: Benchmarking the Code on Windows (x86_64)
Let's compile and run the code. We'll create three Run Configurations (for Java 16, Java 17, and a Java 18 Nightly.) We must also pass a flag to the JRE to enable the Vector API because incubating features are disabled by default:
Run > Run Configurations
    Select "Java Application" then click the "New Launch Configuration" toolbar icon.
    Name = "Vector API Test (This PC, Java 16)"
    Arguments tab > VM argument = --add-modules=jdk.incubator.vector
    JRE tab > Alternate JRE = jdk-16
	Apply

    With the current run configuration selected, click the "Duplicate" toolbar icon
	Name = "Vector API Test (This PC, Java 17)"
    JRE tab > Alternate JRE = jdk-17
	Apply

    With the current run configuration selected, click the "Duplicate" toolbar icon
	Name = "Vector API Test (This PC, Java 18 Nightly)"
    JRE tab > Alternate JRE = jdk-18-nightly
	Apply

	Close
Expanding the "Java Application" tree in the Launch Configurations tab reveals the three launch configurations. Double-click on each one to run them. On my laptop I get the following results:
Windows 10, x86_64, Adoptium Java 16:
Verifying checksums, scalar  code... took  2393.890 ms
Verifying checksums, vectorA code... took  2310.526 ms      >>>    3.5% faster than scalar <<<
Verifying checksums, vectorB code... took 11543.454 ms      >>> -382.2% faster than scalar <<<
Verifying checksums, vectorC code... took  4459.361 ms      >>>  -86.3% faster than scalar <<<
Verifying checksums, vectorD code... took  8766.583 ms      >>> -266.2% faster than scalar <<<

Windows 10, x86_64, Adoptium Java 17:
Verifying checksums, scalar  code... took  2587.480 ms
Verifying checksums, vectorA code... took  2175.599 ms      >>>   15.9% faster than scalar <<<
Verifying checksums, vectorB code... took  4009.761 ms      >>>  -55.0% faster than scalar <<<
Verifying checksums, vectorC code... took  1704.891 ms      >>>   34.1% faster than scalar <<<
Verifying checksums, vectorD code... took  8657.405 ms      >>> -234.6% faster than scalar <<<

Windows 10, x86_64, Shipilev Java 18 Nightly:
Verifying checksums, scalar  code... took  2597.357 ms
Verifying checksums, vectorA code... took  2054.242 ms      >>>   20.9% faster than scalar <<<
Verifying checksums, vectorB code... took  4061.849 ms      >>>  -56.4% faster than scalar <<<
Verifying checksums, vectorC code... took  1716.538 ms      >>>   33.9% faster than scalar <<<
Verifying checksums, vectorD code... took  8719.769 ms      >>> -235.7% faster than scalar <<<
Having tested on only one OS and one architechure has already revealed a lot:
- Newer JDK releases have made significant performance improvements.
- Curiously, Java 17 and 18 seem to be a little slower when running my scalar code.
- Some of my vectorized attempts are still much slower than the scalar code.
While trying to figure out my performance issues I found it helpful to skim through the JEPs. JEP 417 (targeted for Java 18) indicates that support for masks will be added soon. My "vectorB" code used masks and ran very slow, so that would explain why. The code for JEP 417 has not been merged in yet, so the Java 18 Nightly build I tried probably doesn't have those improvements. I'll be keeping an eye on this pull request: https://github.com/openjdk/jdk/pull/5873.
I'm still not sure why "vectorD" was so slow. I'm guessing it would be faster if my data was nicely aligned.
Part 6: Benchmarking the Code on a Linux VM (x86_64)
Start by SSH'ing into a Linux VM and downloading the JDKs into ~/java_projects/. The Terminal tab in Eclipse can be used for this:
ssh farrellf@FarrellF-UbuntuVM -i Desktop/id_rsa
$ mkdir java_projects
$ cd java_projects
$ wget https://github.com/adoptium/temurin16-binaries/releases/download/jdk-16.0.2%2B7/OpenJDK16U-jdk_x64_linux_hotspot_16.0.2_7.tar.gz
$ wget https://github.com/adoptium/temurin17-binaries/releases/download/jdk-17.0.1%2B12/OpenJDK17U-jdk_x64_linux_hotspot_17.0.1_12.tar.gz
$ wget https://builds.shipilev.net/openjdk-jdk/openjdk-jdk-linux-x86_64-server-release.tar.xz
$ tar -xvf OpenJDK16U-jdk_x64_linux_hotspot_16.0.2_7.tar.gz
$ tar -xvf OpenJDK17U-jdk_x64_linux_hotspot_17.0.1_12.tar.gz
$ tar -xvf openjdk-jdk-linux-x86_64-server-release.tar.xz
$ exit
Use SCP to copy the code to the VM, then use SSH to run that code on the VM with various JDKs:
scp -i "Desktop/id_rsa" "C:\Users\FarrellF\eclipse-workspace\Vector API Test\src\Main.java" farrellf@FarrellF-UbuntuVM:~/java_projects/
ssh -i "Desktop/id_rsa" farrellf@FarrellF-UbuntuVM "~/java_projects/jdk-16.0.2+7/bin/java --add-modules=jdk.incubator.vector ~/java_projects/Main.java"
ssh -i "Desktop/id_rsa" farrellf@FarrellF-UbuntuVM "~/java_projects/jdk-17.0.1+12/bin/java --add-modules=jdk.incubator.vector ~/java_projects/Main.java"
ssh -i "Desktop/id_rsa" farrellf@FarrellF-UbuntuVM "~/java_projects/jdk/bin/java --add-modules=jdk.incubator.vector ~/java_projects/Main.java"
It will get annoying having to copy-and-paste the SCP and SSH commands every time you make a change and want to run another test. Eclipse's "External Tools Configuration" feature makes it easy to invoke tools outside the IDE. We can use the command line (cmd.exe) as an external tool, and have it run SCP and SSH for us:
Run > External Tools > External Tools Configurations
    Select "Program" then click the "New Launch Configuration" toolbar icon.
    Name = Vector API Test (Linux VM, Java 16)
    Location = C:\Windows\System32\cmd.exe
    Arguments = /c scp -i "C:/Users/FarrellF/Desktop/id_rsa" "C:/Users/FarrellF/eclipse-workspace/Vector API Test/src/Main.java" farrellf@FarrellF-UbuntuVM:~/java_projects/ && ssh -i "C:/Users/FarrellF/Desktop/id_rsa" farrellf@FarrellF-UbuntuVM "~/java_projects/jdk-16.0.2+7/bin/java --add-modules=jdk.incubator.vector ~/java_projects/Main.java"
	Apply

    With the current run configuration selected, click the "Duplicate" toolbar icon
	Name = Vector API Test (Linux VM, Java 17)
    Arguments = /c scp -i "C:/Users/FarrellF/Desktop/id_rsa" "C:/Users/FarrellF/eclipse-workspace/Vector API Test/src/Main.java" farrellf@FarrellF-UbuntuVM:~/java_projects/ && ssh -i "C:/Users/FarrellF/Desktop/id_rsa" farrellf@FarrellF-UbuntuVM "~/java_projects/jdk-17.0.1+12/bin/java --add-modules=jdk.incubator.vector ~/java_projects/Main.java"
	Apply

    With the current run configuration selected, click the "Duplicate" toolbar icon
	Name = Vector API Test (Linux VM, Java 18 Nightly)
    Arguments = /c scp -i "C:/Users/FarrellF/Desktop/id_rsa" "C:/Users/FarrellF/eclipse-workspace/Vector API Test/src/Main.java" farrellf@FarrellF-UbuntuVM:~/java_projects/ && ssh -i "C:/Users/FarrellF/Desktop/id_rsa" farrellf@FarrellF-UbuntuVM "~/java_projects/jdk/bin/java --add-modules=jdk.incubator.vector ~/java_projects/Main.java"
	Apply

	Close
Expanding the "Program" tree in the Launch Configurations tab reveals the three external tool configurations. Double-click on each one to run them. With my VM I got the following results:
Linux VM, x86_64, Adoptium Java 16:
Verifying checksums, scalar  code... took  2904.334 ms
Verifying checksums, vectorA code... took  2722.829 ms      >>>    6.2% faster than scalar <<<
Verifying checksums, vectorB code... took 837828.999 ms     >>> -28747.5% faster than scalar <<<
Verifying checksums, vectorC code... took 408426.271 ms     >>> -13962.6% faster than scalar <<<
Verifying checksums, vectorD code... took  9764.034 ms      >>> -236.2% faster than scalar <<<

Linux VM, x86_64, Adoptium Java 17:
Verifying checksums, scalar  code... took  3094.979 ms
Verifying checksums, vectorA code... took  2653.237 ms      >>>   14.3% faster than scalar <<<
Verifying checksums, vectorB code... took  5224.525 ms      >>>  -68.8% faster than scalar <<<
Verifying checksums, vectorC code... took  2106.555 ms      >>>   31.9% faster than scalar <<<
Verifying checksums, vectorD code... took  9288.912 ms      >>> -200.1% faster than scalar <<<

Linux VM, x86_64, Shipilev Java 18 Nightly:
Verifying checksums, scalar  code... took  2979.614 ms
Verifying checksums, vectorA code... took  2355.044 ms      >>>   21.0% faster than scalar <<<
Verifying checksums, vectorB code... took  5235.825 ms      >>>  -75.7% faster than scalar <<<
Verifying checksums, vectorC code... took  2095.325 ms      >>>   29.7% faster than scalar <<<
Verifying checksums, vectorD code... took  9172.082 ms      >>> -207.8% faster than scalar <<<
As we can see, Java 16 seems to have a bug where some vectorized code is REDICULOUSLY slow when running in a VM. This also happens when Windows in running in a VM, so it's not specific to Linux VMs.
Part 7: Benchmarking the Code on a Raspberry Pi 4 (Arm32)
Before getting started, I like to change the username on my Pi, the hostname of my Pi, and configure SSH to require key authentication. This is all optional, but here's how to do it if you want to:
ssh pi@raspberrypi
$ sudo adduser farrellf
$ sudo usermod -a -G adm,dialout,cdrom,sudo,audio,video,plugdev,games,users,input,netdev,gpio,i2c,spi farrellf
$ sudo su - farrellf
$ sudo raspi-config
	1 System Options > S4 Hostname > Ok > "FarrellF-Pi4" > Ok
	1 System Options > S5 Boot / Auto Login > B4 Desktop Autologin > Finish > Yes

After the Pi reboots:

ssh farrellf@FarrellF-Pi4
$ sudo deluser -remove-home pi
$ mkdir ~/.ssh
$ exit

scp "C:/Users/FarrellF/Desktop/id_rsa.pub" farrellf@FarrellF-Pi4:~/.ssh/authorized_keys
ssh farrellf@FarrellF-Pi4
$ chmod 700 ~/.ssh/authorized_keys
$ sudo nano /etc/ssh/sshd_config
	Uncomment and edit these lines:
		PubkeyAuthentication yes
		PasswordAuthentication no
	Save the file and exit: Ctrl+O > Enter > Ctrl-X
$ sudo systemctl restart ssh
$ exit

Test SSH login with keys:
ssh farrellf@FarrellF-Pi4 -i Desktop/id_rsa
$ exit
Note that the above commands replaced the "authorized_keys" file, which is fine for a new user. You may want to append to that file instead if your Pi user already has an authorized_keys file.
Downloading and extracting the JDKs is identical to what we did for the Linux VM, but we need to download 32-bit ARM builds instead:
ssh farrellf@FarrellF-Pi4 -i Desktop/id_rsa
$ mkdir java_projects
$ cd java_projects
$ wget https://github.com/adoptium/temurin16-binaries/releases/download/jdk-16.0.2%2B7/OpenJDK16U-jdk_arm_linux_hotspot_16.0.2_7.tar.gz
$ wget https://github.com/adoptium/temurin17-binaries/releases/download/jdk-17.0.1%2B12/OpenJDK17U-jdk_arm_linux_hotspot_17.0.1_12.tar.gz
$ wget https://builds.shipilev.net/openjdk-jdk/openjdk-jdk-linux-arm32-hflt-server-release.tar.xz
$ tar -xvf OpenJDK16U-jdk_arm_linux_hotspot_16.0.2_7.tar.gz
$ tar -xvf OpenJDK17U-jdk_arm_linux_hotspot_17.0.1_12.tar.gz
$ tar -xvf openjdk-jdk-linux-arm32-hflt-server-release.tar.xz
$ exit
Add some more External Tools Configurations like before:
Run > External Tools > External Tools Configurations
    With the one of the run configurations selected, click the "Duplicate" toolbar icon
	Name = Vector API Test (Pi 4, Java 16)
    Arguments = /c scp -i "C:/Users/FarrellF/Desktop/id_rsa" "C:/Users/FarrellF/eclipse-workspace/Vector API Test/src/Main.java" farrellf@FarrellF-Pi4:~/java_projects/ && ssh -i "C:/Users/FarrellF/Desktop/id_rsa" farrellf@FarrellF-Pi4 "~/java_projects/jdk-16.0.2+7/bin/java --add-modules=jdk.incubator.vector ~/java_projects/Main.java"
	Apply

    With the current run configuration selected, click the "Duplicate" toolbar icon
	Name = Vector API Test (Pi 4, Java 17)
    Arguments = /c scp -i "C:/Users/FarrellF/Desktop/id_rsa" "C:/Users/FarrellF/eclipse-workspace/Vector API Test/src/Main.java" farrellf@FarrellF-UbuntuVM:~/java_projects/ && ssh -i "C:/Users/FarrellF/Desktop/id_rsa" farrellf@FarrellF-UbuntuVM "~/java_projects/jdk-17.0.1+12/bin/java --add-modules=jdk.incubator.vector ~/java_projects/Main.java"
	Apply

    With the current run configuration selected, click the "Duplicate" toolbar icon
	Name = Vector API Test (Pi 4, Java 18 Nightly)
    Arguments = /c scp -i "C:/Users/FarrellF/Desktop/id_rsa" "C:/Users/FarrellF/eclipse-workspace/Vector API Test/src/Main.java" farrellf@FarrellF-Pi4:~/java_projects/ && ssh -i "C:/Users/FarrellF/Desktop/id_rsa" farrellf@FarrellF-Pi4 "~/java_projects/jdk/bin/java --add-modules=jdk.incubator.vector ~/java_projects/Main.java"
	Apply

	Close
The "Program" tree in the Launch Configurations tab reveals the three additional external tool configurations. Double-click on each one to run them. I got the following results:
Pi 4, Arm32, Adoptium Java 16:
Verifying checksums, scalar  code... took 11881.300 ms
Verifying checksums, vectorA code... took 221895.978 ms      >>> -1767.6% faster than scalar <<<
Verifying checksums, vectorB code... #
# A fatal error has been detected by the Java Runtime Environment:
#
#  Internal Error (arm.ad:1028), pid=5840, tid=6345
#  Error: ShouldNotReachHere()
#
# JRE version: OpenJDK Runtime Environment Temurin-16.0.2+7 (16.0.2+7) (build 16.0.2+7)
# Java VM: OpenJDK Server VM Temurin-16.0.2+7 (16.0.2+7, mixed mode, g1 gc, linux-arm)
# Problematic frame:
# V  [libjvm.so+0xd341c]  Matcher::vector_ideal_reg(int)+0x44
...

Pi 4, Arm32, Adoptium Java 17:
Verifying checksums, scalar  code... took 11505.220 ms
Verifying checksums, vectorA code... #
# A fatal error has been detected by the Java Runtime Environment:
#
#  SIGBUS (0x7) at pc=0xb3e8b4dc, pid=6606, tid=6607
#
# JRE version: OpenJDK Runtime Environment Temurin-17.0.1+12 (17.0.1+12) (build 17.0.1+12)
# Java VM: OpenJDK Server VM Temurin-17.0.1+12 (17.0.1+12, mixed mode, sharing, g1 gc, linux-arm)
# Problematic frame:
# J 582 c2 jdk.incubator.vector.Short64Vector.fromByteArray0([BI)Ljdk/incubator/vector/ShortVector; jdk.incubator.vector@17.0.1 (7 bytes) @ 0xb3e8b4dc [0xb3e8b490+0x0000004c]
...

Pi 4, Arm32-HFLT, Shipilev Java 18 Nightly:
Error: dl failure on line 542
Error: failed /home/farrellf/java_projects/jdk/lib/server/libjvm.so, because /lib/arm-linux-gnueabihf/libm.so.6: version `GLIBC_2.29' not found (required by /home/farrellf/java_projects/jdk/lib/server/libjvm.so)
Well... that was a let down. Java 16 and 17 crashed, and the Java 18 Nightly build needs a newer version of GLIBC than Raspberry Pi OS comes with. I didn't expect these tests to perform well because the JEPs specifically say they are only targeting x86_64 and AArch64, but I was curious to see how the fallback implementations would perform on Arm32.
Part 8: Benchmarking the Code on a Raspberry Pi 4 (AArch64)
The official Raspberry Pi OS is 32-bit but they have started to offer a beta AArch64 version: https://downloads.raspberrypi.org/raspios_arm64/images/ Let's try it out.
Like before, I changed my username / hostname / SSH configuration as described in Part 7.
Downloading and extracting the JDKs is identical to what we did in Part 7, but we need to download 64-bit ARM ("AArch64") builds instead:
ssh farrellf@FarrellF-Pi4 -i Desktop/id_rsa
$ mkdir java_projects
$ cd java_projects
$ wget https://github.com/adoptium/temurin16-binaries/releases/download/jdk-16.0.2%2B7/OpenJDK16U-jdk_aarch64_linux_hotspot_16.0.2_7.tar.gz
$ wget https://github.com/adoptium/temurin17-binaries/releases/download/jdk-17.0.1%2B12/OpenJDK17U-jdk_aarch64_linux_hotspot_17.0.1_12.tar.gz
$ wget https://builds.shipilev.net/openjdk-jdk/openjdk-jdk-linux-aarch64-server-release.tar.xz
$ tar -xvf OpenJDK16U-jdk_aarch64_linux_hotspot_16.0.2_7.tar.gz
$ tar -xvf OpenJDK17U-jdk_aarch64_linux_hotspot_17.0.1_12.tar.gz
$ tar -xvf openjdk-jdk-linux-aarch64-server-release.tar.xz
$ exit
I'm using the same Pi as before, just booted from another disk, so there is no need to create more External Tool Configurations. Double-click on each of the existing Pi configurations to run them. I got the following results:
Pi 4, AArch64, Adoptium Java 16:
Verifying checksums, scalar  code... took 11517.057 ms
Verifying checksums, vectorA code... took  9384.111 ms      >>>   18.5% faster than scalar <<<
Verifying checksums, vectorB code... took 7495015.143 ms    >>> -64977.5% faster than scalar <<<
Verifying checksums, vectorC code... took 3282422.142 ms    >>> -28400.5% faster than scalar <<<
Verifying checksums, vectorD code... took 273615.500 ms     >>> -2275.7% faster than scalar <<<

Pi 4, AArch64, Adoptium Java 17:
Verifying checksums, scalar  code... took 11575.545 ms
Verifying checksums, vectorA code... took  9377.791 ms      >>>   19.0% faster than scalar <<<
Verifying checksums, vectorB code... took 8032002.942 ms    >>> -69287.7% faster than scalar <<<
Verifying checksums, vectorC code... took 3451573.463 ms    >>> -29717.8% faster than scalar <<<
Verifying checksums, vectorD code... took 249912.099 ms     >>> -2059.0% faster than scalar <<<

Pi 4, AArch64, Shipilev Java 18 Nightly:
Error: dl failure on line 542
Error: failed /home/farrellf/java_projects/jdk/lib/server/libjvm.so, because /lib/aarch64-linux-gnu/libm.so.6: version `GLIBC_2.29' not found (required by /home/farrellf/java_projects/jdk/lib/server/libjvm.so)
The GLIBC error is because the Shipilev binaries were built against a newer version of GLIBC than what's used in Raspberry Pi OS. A quick test revealed that the JDK 18 Early Access builds from the OpenJDK project work. But the performance is still horrible:
Pi 4, AArch64, OpenJDK Java 18 EA:
Verifying checksums, scalar  code... took 11759.950 ms
Verifying checksums, vectorA code... took  9568.449 ms      >>>   18.6% faster than scalar <<<
Verifying checksums, vectorB code... took 8132770.026 ms    >>> -69056.5% faster than scalar <<<
Verifying checksums, vectorC code... took 3548230.455 ms    >>> -30072.2% faster than scalar <<<
Verifying checksums, vectorD code... took 245422.380 ms     >>> -1986.9% faster than scalar <<<
It looks like the SIMD registers on the Pi 4 CPU are 128 bits wide, which explains why my code that requested 256 bit registers performed so poorly. This is why the API lets you obtain a "preferred" register size instead of hardcoding it. I'm still surprised at how poorly the API's fallback implementations perform.
Part 9: Crude CI/CD with Launch Groups
Now that I have some ideas of where to change my code, I'm ready to run more experiments. I could make changes, then double-click on each of the nine run configurations to test how they perform... but that will get annoying pretty quick. For a complex project, you might setup a CI/CD pipeline to automate all of this. For a simple project, Eclipse's "Launch Group" feature helps out and keeps things simple. It automates the running of multiple run configurations and external tool configurations. The runs can be done in parallel or sequentially. I'm trying to test performace so I'll run them sequentially:
Run > Run Configurations > Launch Group > click the "New Launch Configuration" toolbar icon
    Name = "Vector API Test (Run All)"
    Add
        Java Application > Vector API Test (This PC, Java 16)
        Post Launch Action = Wait until terminated
        OK
    Add
        Java Application > Vector API Test (This PC, Java 17)
        Post Launch Action = Wait until terminated
        OK
    Add
        Java Application > Vector API Test (This PC, Java 18 Nightly)
        Post Launch Action = Wait until terminated
        OK
    Add
        Program > Vector API Test (Linux VM, Java 16)
        Post Launch Action = Wait until terminated
        OK
    Add
        Program > Vector API Test (Linux VM, Java 17)
        Post Launch Action = Wait until terminated
        OK
    Add
        Program > Vector API Test (Linux VM, Java 18 Nightly)
        Post Launch Action = Wait until terminated
        OK
    Add
        Program > Vector API Test (Pi 4, Java 16)
        Post Launch Action = Wait until terminated
        OK
    Add
        Program > Vector API Test (Pi 4, Java 17)
        Post Launch Action = Wait until terminated
        OK
    Add
        Program > Vector API Test (Pi 4, Java 18 Nightly)
        Post Launch Action = Wait until terminated
        OK
	Apply
	Close
Double-clicking the newly created Launch Group in the Launch Configrations tab will kick off the whole process. We'll end up with nine consoles, which can be accessed by clicking on the console tab's "Display Selected Console" toolbar icon.
Part 10: Looking Under the Hood with JITWatch
It would be nice to confirm if our code is getting compiled by the JIT. The PrintCompilation JRE flag can be used to see what methods get JIT'd:
-XX:+PrintCompilation
That can be useful for a quick check, but often it's more helpful to see the actual disassembly. This is particularly useful when trying out the Vector API so we can see if the generated code matches the SIMD instructions we were hoping to invoke. A handful of JRE flags can be used for this:
-XX:+UnlockDiagnosticVMOptions -XX:+LogCompilation -XX:+PrintAssembly -XX:PrintAssemblyOptions=intel -XX:LogFile=hotspot.log
If you run your code with those flags you'll end up with lots of text printed to the console and also a log file. Looking carefully reveals that it only printed the machine code, not the corresponding assembly. This is because the JDK requires the HSDIS library to disassemble the code but they can't include that library due to license conflicts. I was unable to find a precompiled HSDIS DLL for x86_64 but found some instructions on how to compile it at: https://dropzone.nfshost.com/hsdis/. We need to install Cygwin, then download the JDK and Binutils source code, and finally compile HSDIS with a special make command. I had problems with Binutils 2.37, but version 2.36.1 worked perfectly:
https://www.cygwin.com/setup-x86_64.exe
    Next > Next > Next > Next > Next > Select a Download Site > Next
        All > Devel > gcc-core > Select the newest version
		All > Devel > make > Select the newest version
		All > Devel > mingw64-x86_64-gcc-code > Select the newest version
		All > Web > wget > Select the newest version
	Next > Next > Finish
Cygwin64 Terminal
	$ cd C:/Users/FarrellF/Desktop
	$ wget https://ftp.gnu.org/gnu/binutils/binutils-2.36.1.tar.xz
	$ tar -xvf binutils-2.36.1.tar.xz
	$ wget https://github.com/openjdk/jdk/archive/refs/tags/jdk-17-ga.tar.gz
	$ tar -xvf jdk-17-ga.tar.gz
	$ cd jdk-jdk-17-ga/src/utils/hsdis/
	$ make OS=Linux MINGW=x86_64-w64-mingw32 BINUTILS=../../../../binutils-2.36.1
	$ cp build/Linux-amd64/hsdis-amd64.dll ../../../../java_projects/jdk-16.0.2+7/bin/
	$ cp build/Linux-amd64/hsdis-amd64.dll ../../../../java_projects/jdk-17.0.1+12/bin/
	$ cp build/Linux-amd64/hsdis-amd64.dll ../../../../java_projects/jdk/bin/
	$ cd ../../../..
	$ rm jdk-17-ga.tar.gz
	$ rm jdk-jdk-17-ga/ -rf
	$ rm binutils-2.36.1.tar.xz
	$ rm binutils-2.36.1/ -rf
	$ exit
Let's create another Run Configuration for collecting that log:
Run > Run Configurations
	With the "This PC, Java 17" run configuration selected, click the "Duplicate" toolbar icon
	Name = Vector API Test (This PC, Java 17, Collect JITWatch Log)
	Arguments > VM Arguments = --add-modules=jdk.incubator.vector -XX:+UnlockDiagnosticVMOptions -XX:+LogCompilation -XX:+PrintAssembly -XX:PrintAssemblyOptions=intel -XX:LogFile=hotspot.log
	Apply
	Close
If you run it, you'll see a massive amount of data printed to the console and a "hotspot.log" file created in the project folder.
JITWatch can be used to process that log file and make it easier to find the information we care about. Download JITWatch and save it in the project folder. Normally you can just double-click the .jar file to run it, but since we are using the incubating Vector API we also have to enable that feature when running JITWatch. Let's create an External Tool Configuration to make it easy:
Download https://github.com/AdoptOpenJDK/jitwatch/releases/download/1.4.2/jitwatch-ui-1.4.2-shaded-win.jar
Save it in the project folder.
In Eclipse, right-click the project > Refresh

Run > External Tools > External Tools Configurations > Click the "New Launch Configuration" toolbar icon
	Name = Run JITWatch
	Location = Browse Filesystem > C:\Users\FarrellF\Desktop\java_projects\jdk-17.0.1+12\bin\java.exe
	Working Directory = Browse Workspace > Select the "Vector API Test" project
	Arguments = --add-modules=jdk.incubator.vector -jar jitwatch-ui-1.4.2-shaded-win.jar
	Apply
	Close
Double-click "Run JITWatch" in the Launch Configurations tab to run the program. After it opens we can select the log file and tell it about our source code. It will parse everything and let us see how our source code corresponds to bytecode and assembly:
Run JITWatch
	Open Log > "hotspot.log"
	Config
		Source Locations > Add Folder > Go to the "src" project subfolder > Select Folder
		Source Locations > Add JDK Src
		Class Locations > Add Folder > Go to the "bin" project subfolder > Select Folder
		Save
	Start

	After a few seconds the log will be parsed.
	Expand the "(default package)" tree > Main > verifyChecksumsScalar() > check "Mouseover"
	Expand the "(default package)" tree > Main > verifyChecksumsVectorA() > check "Mouseover"
	Expand the "(default package)" tree > Main > verifyChecksumsVectorB() > check "Mouseover"
	Expand the "(default package)" tree > Main > verifyChecksumsVectorC() > check "Mouseover"
	Expand the "(default package)" tree > Main > verifyChecksumsVectorD() > check "Mouseover"
The left pane contains Java source code, the center pane contains Java bytecode, and the right pane contains the actual assembly instructions. Hovering over a line of bytecode will reveal a little more information about it. For example, with the vectorized methods we see several green lines of bytecode that were inlined by the VM.
Further reading:
- More information about the JRE flags:
https://wiki.openjdk.java.net/display/HotSpot/PrintAssembly
https://wiki.openjdk.java.net/display/HotSpot/LogCompilation+overview
https://stackoverflow.com/questions/1503479/how-to-see-jit-compiled-code-in-jvm - Intel Architectures Software Developer's Manuals
https://www.intel.com/content/www/us/en/developer/articles/technical/intel-sdm.html