First Steps with the STM32F4 in Linux (Part 2)

In part one the toolchain was installed, the STM library was built and an example project was compiled and uploaded to the board.

This part will cover some of the ways firmware can be written for the STM32F4 with the C programming language. To keep things short each example will only show how to light up the blue LED on the development board.

C
One step up from assembly would be to code in C without the benefit of any libraries or header files. Figure out what register needs to be accessed, read or write to the necessary bits, and go from there. For trivial projects this is fairly easy. The reference manual (RM0090) has the memory map on p.50 (Section 2.3) which provides all of the base addresses. The RCC register map is on p.134 (Section 5.3.24) and the GPIO register map is on p.153 (Section 6.4.11). For example, to light up the blue LED on the development board (and do nothing else) you would use need to enable the GPIOD clock, set pin 15 of GPIOD as an output, and set the pin high:

void main() { // Enable GPIOD clock *(unsigned int*) 0x40023830 |= (1 << 3); // RCC base: 0x40023800 // AHB1ENR offset: 0x30 // GPIOD enable: set bit 3 // Enable output mode for D15 *(unsigned int*) 0x40020C00 |= (1 << 15*2); // GPIOD base: 0x40020C00 // MODER offset: 0x00 // Pin 15 output: set bit 30 // Set D15 high *(unsigned int*) 0x40020C18 = (1 << 15); // GPIOD base: 0x40020C00 // BSRR offset: 0x18 // Pin 15 high: set bit 15 }

C with the stm32f4xx.h Header
Looking up memory addresses by hand gets old real quick. The stm32f4xx.h header file provided by STM has hundreds of macros that provide convenient names for each register and setting. It's a huge header, at just over 500KB, but traversing it is quick once you get used to the layout. The header defines structures for each subsystem and bitmasks for each structure. Redoing the above example to utilize this header results in more readable code:

#include "stm32f4xx.h" int main() { // Enable GPIOD clock RCC->AHB1ENR |= RCC_AHB1ENR_GPIODEN; // Enable output mode for D15 GPIOD->MODER |= GPIO_MODER_MODER15_0; // Set D15 high GPIOD->BSRRL = GPIO_BSRR_BS_15; }

C with the STM Standard Peripheral Drivers Library
The STM library provides functions that abstract away some of the details. Instead of playing with memory directly, function calls are used. This library was downloaded and built in part one. Redoing the above example yields:

#include "stm32f4xx_rcc.h" #include "stm32f4xx_gpio.h" GPIO_InitTypeDef outputSettings; int main() { // Enable GPIOD clock RCC_AHB1PeriphClockCmd(RCC_AHB1Periph_GPIOD, ENABLE); // Enable output mode for D15 outputSettings.GPIO_Pin = GPIO_Pin_15; outputSettings.GPIO_Mode = GPIO_Mode_OUT; GPIO_Init(GPIOD, &outputSettings); // Set D15 high GPIO_SetBits(GPIOD, GPIO_Pin_15); }

Download the project, build it with make and upload it with make install. The Makefile for this project expects the archive to be extracted to ~/stm32f4/projects/.

C with the libopencm3 Library
There are several unofficial libraries for the STM32 microcontrollers and libopencm3 is one of the more popular ones. It's a work-in-progress so the library is still evolving. The function names are more logical and this library seems to have a promising future. Download and build the library:

$ cd ~/stm32f4 $ git clone git://libopencm3.git.sourceforge.net/gitroot/libopencm3/libopencm3 $ cd libopencm3 $ make

Here's the LED example code ported to this library:

#include "libopencm3/stm32/f4/rcc.h" #include "libopencm3/stm32/f4/gpio.h" void main() { // Enable GPIOD clock rcc_peripheral_enable_clock(&RCC_AHB1ENR, RCC_AHB1ENR_IOPDEN); // Enable output mode for D15 gpio_mode_setup(GPIOD, GPIO_MODE_OUTPUT, GPIO_PUPD_NONE, GPIO15); // Set D15 high gpio_set(GPIOD, GPIO15); }

Download the project, build it with make and upload it with make install. The Makefile for this project expects the archive to be extracted to ~/stm32f4/projects/.

Become familiar with whatever library you choose by skimming through their example projects and carefully reading any headers that are included in those examples. I'll be covering the basics of the STM library in a later post: general purpose inputs, ADC usage, PWM, timers and more.
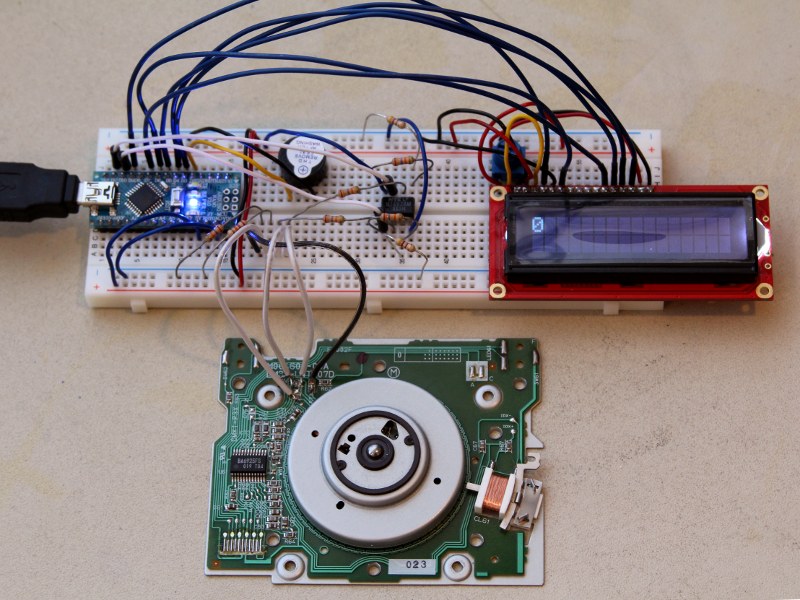
First Steps with the STM32F4 in Linux (Part 1)

The Arduino is easy and fun to use but eventually a project will come along that needs more power. There are plenty of Arduino-compatible boards that use a more powerful PIC or ARM microcontroller and preserve the ease of use. Those are probably great options, but I wanted to step outside of that comfort-zone and learn the ARM architecture from the ground up. It's a steep learning curve, but very fun and rewarding if you aren't in a rush.

The STM32F4DISCOVERY development board turned out to be a great option:

    ARM Cortex-M4F with FPU (32-bit, adjustable clock up to 168MHz)
        1MB Flash, 192+4KB SRAM
        12-bit ADCs, 12-bit DACs
        17 timers
        5V tolerant IO
        I2C, I2S, USART, UART, SPI, USB and lots more.
    MEMS digital accelerometer
    MEMS digital microphone
    Audio DAC with class D speaker driver
    ST-LINK V2 built-in
    Four LEDS and a pushbutton

At $17 it's hard to pass up. Unfortunately there are two noteworthy issues. STM does not support any open-source or free development environments. The four that are supported (TrueSTUDIO, TASKING, MDK-ARM and EWARM) aren't cheap however there are limited demo versions available for free if you use Windows. The other issue is a lack of documentation for people still learning how to use an MCU. I don't blame ST for this since they don't market it for beginners, but it is an issue for people who want to transition out of easy-to-use MCU environments like the Arduino or BS2.

Let's install the toolchain, ST-link utility, build an example project and go over some of the documentation and firmware packages. There are several options for the toolchain and the two most popular seem to be Summon ARM Toolchain and GCC ARM Embedded. SAT downloads the source packages for all of the tools and automates the compilation process. GCC ARM Embedded comes as a precompiled archive that you simply extract and add to your $PATH. I decided to use GCC Arm Embedded but directions for both are listed below. Only install one toolchain!

Install the Toolchain - Summon ARM Toolchain
Install some dependencies from the Ubuntu repositories, download SAT, compile it and add the SAT path to your $PATH environment variable:

$ sudo apt-get install flex bison libgmp3-dev libmpfr-dev libncurses5-dev libmpc-dev autoconf \ texinfo build-essential libftdi-dev libsgutils2-dev zlib1g-dev libusb-1.0-0-dev git $ mkdir ~/stm32f4 $ cd ~/stm32f4 $ git clone https://github.com/esden/summon-arm-toolchain.git $ cd summon-arm-toolchain $ sudo ./summon-arm-toolchain $ export PATH=~/sat/bin:$PATH $ echo export PATH=~/sat/bin:\$PATH >> ~/.profile

Install the Toolchain - GCC ARM Embedded
Download the archive, extract it and add the GCC ARM Embedded path to your $PATH environment variable:

$ mkdir ~/stm32f4 $ cd ~/stm32f4 $ wget https://launchpad.net/gcc-arm-embedded/4.6/4.6-2012-q1-update/+download/\ gcc-arm-none-eabi-4_6-2012q1-20120316.tar.bz2 $ tar -xjvf gcc-arm-none-eabi-4_6-2012q1-20120316.tar.bz2 $ export PATH=~/stm32f4/gcc-arm-none-eabi-4_6-2012q1/bin:$PATH $ echo export PATH=~/stm32f4/gcc-arm-none-eabi-4_6-2012q1/bin:\$PATH >> ~/.profile

The latest version will probably be different. Download the latest version from https://launchpad.net/gcc-arm-embedded and modify the extract/$PATH commands listed above accordingly.

Install ST-link
Install libusb-dev and git from the Ubuntu repositories, download stlink, compile it and allow device access for regular users:

$ sudo apt-get install libusb-1.0-0-dev git $ cd ~/stm32f4 $ git clone https://github.com/texane/stlink.git $ cd stlink $ ./autogen.sh $ ./configure $ make $ sudo make install $ sudo cp 49-stlinkv1.rules /etc/udev/rules.d/ $ sudo cp 49-stlinkv2.rules /etc/udev/rules.d/ $ sudo udevadm control --reload-rules

Build an Example Project
STM has a firmware library (more on that later) but it is not setup for use with Linux or any of the open-source IDEs. The stlink package includes a copy of the firmware with Makefiles and linker scripts, and Karl Palsson has collected/modified/written a nice collection that builds on top of that. It's a work-in-progress and his collection is available on GitHub. He also has a blog that covers the STM32 series and lots of other stuff. Check it out: http://false.ekta.is/category/stm32/

Download his collection, build the STM Standard Peripheral Drivers, build the IO_Toggle project, and upload the resulting firmware to the board:

$ cd ~/stm32f4 $ git clone git://github.com/karlp/kkstm32_base $ cd kkstm32_base/example/stm32f4/STM32F4xx_StdPeriph_Driver/build/ $ make $ cd ../../Projects/IO_Toggle/ $ make $ st-flash write IO_Toggle.bin 0x08000000

If everything worked correctly the last line printed to the terminal will be “...Flash written and verified! jolly good!” The example project justs blinks the four LEDs located around the accelerometer in a circular fashion.

Documentation and Official Firmware Packages
There are three main sources of documentation: STM's page for the microcontroller, STM's page for the development board, and ARM's page for the Cortex-M4 (STM's chip is built on ARM's platform.) Among the dozens of files, I found these to be the most helpful for getting started:

Microcontroller: http://www.st.com/internet/mcu/subclass/1521.jsp (click on the Resources tab)
        RM0090 Reference Manual for the STM32F4 series. It covers everything. Start here:
                Memory map on p.50 (Section 2.3)
                Reset and clock control register map on p.134 (Section 5.3.24)
                GPIO register map on p.153 (Section 6.4.11)
        PM0214 Programming Manual for the STM32F4 series
                Covers assembly language and how the processor works.
        DM00037051 Datasheet for the STM32F407xx and STM32F405xx series
                Specifications and technical information.
        stm32f4_dsp_stdperiph_lib.zip
                General firmware package with project files for Windows IDEs.

Development Board: http://www.st.com/internet/evalboard/product/252419.jsp (click on the Design Support tab)
        UM1472 User Manual for the STM32F4DISCOVERY board
                General introduction, schematic and board details.
                Extension Connectors table on p.20 (Section 4.12) covers what each pin can do.
        stm32f4discovery_fw.zip
                Firmware collection that highlights the development board peripherals.

ARM: http://www.arm.com/products/processors/cortex-m/cortex-m4-processor.php
        DDI0439C Cortex-M4 Technical Reference Manual
                Everything builds upon this specification.

Brushless Motors as Rotary Encoders

Brushless motors can be used as rotary encoders. When the rotor is turned the three coils will produce AC waveforms, each one-third out of phase with the next coil. The period and amplitude depend on how fast the rotor is turned. Spinning the rotor faster will result in shorter periods and higher amplitudes. Feeding those waveforms into op amps does the trick. For this test I displayed a number on an LCD and used a buzzer to play a 5KHz tone for each clockwise movement and a 1KHz tone for each counter-clockwise movement. The motor is from an old floppy disk drive.

The op amps are used to turn each AC waveform into a square wave that can be interpreted by the microcontroller:

If an op amp is used as a simple comparator (waveform going to one input, with the other input tied to ground) there will be problems if you spin the rotor slowly or very fast. The slightest amount of noise will cause glitches. (The output will swing high or low when it shouldn't.)

A little positive feedback adds hysteresis to the circuit. This is simply a threshold which must be crossed in order to get the output to swing high or low. For my particular motor I needed the threshold to be approximately 70mV. If the threshold is too low noise can still get through and cause problems. If the threshold is too high you will not be able to sense slow rotations. The sweet spot will be different for every motor.

Positive feedback supplies part of the op amp output back into the non-inverting input. A voltage divider is used to provide the feedback, one end goes to the op amp output and the other end goes to ground. To get 70mV when the output is high I needed two resistors with a 54.3:1 ratio. To find the x:1 ratio, use: x = (output high voltage) / (desired mV) * 1000. To minimize current flow the two resistors should add up to more than 1K. The op amps I used will output about 3.8V when supplied with 5V so I used some 27K and 470 resistors that I had laying around which gave a 66mV threshold.

When an op amp input has a voltage below the negative supply voltage, most op amps will effectively short that input to ground through a diode. Since the motor is only being spun by hand this will not be a problem but some current limiting resistors should be in series with all motor leads to be on the safe side. Also keep the op amp voltage limits in mind when using larger motors or if you will be spinning the rotor at a significant speed.

I initially set up three op amps, one for each coil. This resulted in noticeable glitching at low speeds. The resistors I used for positive feedback have a 5% tolerance, resulting in the threshold for each coil being slightly different. I'm fairly certain that was the cause of the problem but I may be wrong. There is still a little glitching when using just two coils but it occurs far less often.

Here's the final schematic and code:

#include <LiquidCrystal.h> LiquidCrystal lcd(9,7,6,5,4,3); // RS, Enable, D4, D5, D6, D7 int count = 0; byte currentA, currentB, previousA, previousB = 0; void setup() { lcd.begin(16, 2); previousA = currentA = digitalRead(10); previousB = currentB = digitalRead(11); } void loop() { previousA = currentA; previousB = currentB; currentA = digitalRead(10); currentB = digitalRead(11); if(previousA == LOW && previousB == LOW && currentA == HIGH && currentB == LOW) { // clockwise count++; tone(2, 5000, 2); } else if(previousA == HIGH && previousB == HIGH && currentA == LOW && currentB == HIGH) { // clockwise count++; tone(2, 5000, 2); } else if(previousA == LOW && previousB == LOW && currentA == LOW && currentB == HIGH) { // counter-clockwise count--; tone(2, 1000, 2); } else if(previousA == HIGH && previousB == HIGH && currentA == HIGH && currentB == LOW) { // counter-clockwise count--; tone(2, 1000, 2); } lcd.setCursor(0, 0); lcd.print(count); lcd.print(" "); }

Rotary Encoders with the Arduino

Rotary encoders are used to measure rotation. Unlike a potentiometer, they can be rotated infinitely in either direction and measure rotation in discrete steps. The scroll wheel of a mouse and volume knob of a car stereo are examples of encoders found in consumer goods. I pulled a small one out of a radio and setup an Arduino to read it and increment or decrement a variable accordingly. For this simple test I displayed the value on an LCD.

How it works:

The encoder has three pins: A, B and C. The C pin goes to ground while A and B are pulled high through current-limiting resistors. Those two pins output square waves that provide useful information. Clockwise rotations result in the A waveform leading the B waveform. Counter-clockwise rotations result in the B waveform leading the A waveform.

The encoder I used has detents. When the shaft is at rest the A and B pins will have the same voltage (both high or both low.) Each click of rotation results in both pins changing polarity, but with a slight time offset. The logic to interpet the square waves can be summarized as follows:

Clockwise = pins going from low/low to high/low and ending up high/high.

Clockwise = pins going from high/high to low/high and ending up low/low.

Counter-clockwise = pins going from low/low to low/high and ending up high/high.

Counter-clockwise = pins going from high/high to high/low and end up low/low.

Since the low-cost rotary encoders in consumer goods typically use mechanical switches (which short A and/or B to C to produce the square waves) you have to deal with switch bounce -- the metal contacts bounce a little when making or breaking contact. I noticed about 30-60us of switch bounce with my particular encoder:

Capacitors can be used to buffer the change in voltage, which effectively masks the problem. Small caps in the nF range are commonly used. Too small and they won't be effective, too large and you can't interpret fast rotations. Recall the RC time constant: t = RC. The time it takes (in seconds) for a capacitor to charge to ~63% or discharge to ~37% through a resistor equals the resistance (in Ohms) multiplied by the capacitance (in Farads.) I had some 27K resistors and 10nF caps laying around, so the time constant for my circuit is approximately 270us. That's more than enough to compensate for the 30-60us of switch bounce without limiting accurate readings of quick rotations. In this circuit the resistors should be at least 1K to minimize current flow, and caps should be chosen so the time constant is less than 1ms.

Here's the final schematic and code:

#include <LiquidCrystal.h> LiquidCrystal lcd(10, 9, 5, 4, 3, 2); // RS, Enable, D4, D5, D6, D7 int count = 0; byte currentA, currentB, previousA, previousB = 0; void setup() { lcd.begin(16, 2); previousA = currentA = digitalRead(12); previousB = currentB = digitalRead(11); } void loop() { previousA = currentA; previousB = currentB; currentA = digitalRead(12); currentB = digitalRead(11); if(previousA == LOW && previousB == LOW && currentA == HIGH && currentB == LOW) // clockwise count++; else if(previousA == HIGH && previousB == HIGH && currentA == LOW && currentB == HIGH) // clockwise count++; else if(previousA == LOW && previousB == LOW && currentA == LOW && currentB == HIGH) // counter-clockwise count--; else if(previousA == HIGH && previousB == HIGH && currentA == HIGH && currentB == LOW) // counter-clockwise count--; lcd.setCursor(0, 0); lcd.print(count); lcd.print(" "); }
< Prev  4